
Get started with Paystack API with nodejs, and expressjs for adding payment features to your application. Before I decided to write this I searched the whole internet to figure out how to use the Paystack API created by kehers because there was none to little documentation on how to use the API instead of using the Paystacks Javascript request format on their official API documentation.
Installation
After setting up your nodejs application then install the paystack API created by kehers:
npm install paystack
then after the installation has been completed, we move to set it up.
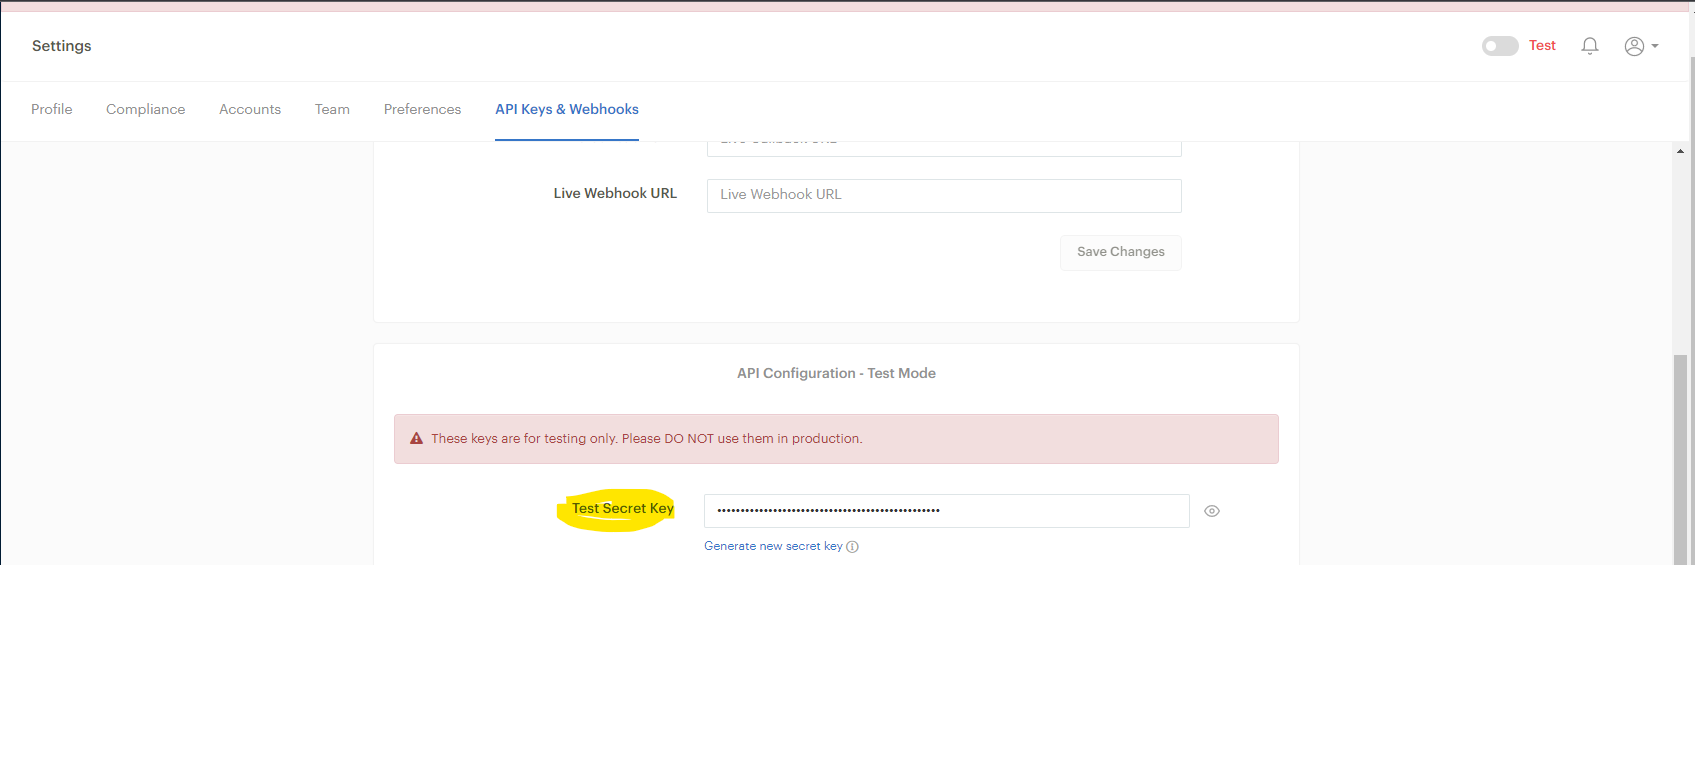
Firstly create a Paystack account and copy the test API secret keys (Note: This is for development purposes only, for production purposes use live keys).
Initialization
Then go ahead and import Paystack
//For JavaScript ES5
const Paystack = require("paystack")("SECRET_KEY");

//For JavaScript ES6+
import Paystack from "paystack";
var paystack = Paystack("SECRET_KEY");
Resources
This is a list of functions that can be used with this API
- customer
- create
- get
- list
- update
- transaction
- initialize
- charge
- get
- list
- totals
- verify
- plan
- create
- get
- list
- update
- page
- create
- get
- list
- update
- subscription
- create
- disable
- enable
- get
- list
- subaccount
- create
- get
- list
- listBanks
- update
- Miscellaneous
- list_banks
- resolve_bin
This article will focus on THREE resources which are:
- transaction
- plan
- page
Transaction
This Paystack function is used to transact on the go i.e. I mean immediately, the function creates a link and access code for the user to go to and transact or charged after that we can also verify the transaction whit the function.
Initialize transaction or payment
 paystack.transaction.initialize({
    name: "Transaction or product name",
    email: "The user email",
    amount: amount * 100, // this because paystack also send kobo
    quantity: "quantity of product just for reference purposes",
    callback_url: "redirect URL"
    metadata:{
         //other information you want to send with the transaction and check when verifying
         userId: ""
     }
  }).then(async(transaction) =>{
  console.log(transaction)
}
you will notice we use some parameters here like name, email e.t.c. You can also use other parameters that can be found here like a channel to select the channel of payment e.g ussd, bank, card etc.
The output from the transaction
{
    "status": true,
    "message": "Authorization URL created",
    "data": {
        "authorization_url": "https://checkout.paystack.com/kixd9nonoitt8kq",
        "access_code": "kixd9nonoitt8kq",
        "reference": "uj4vb5ginv"
    }
}
authorization_url is the link the individual need to go to initiate the transaction, the access code is the code route to that specific transaction and the reference number.
The link webpage
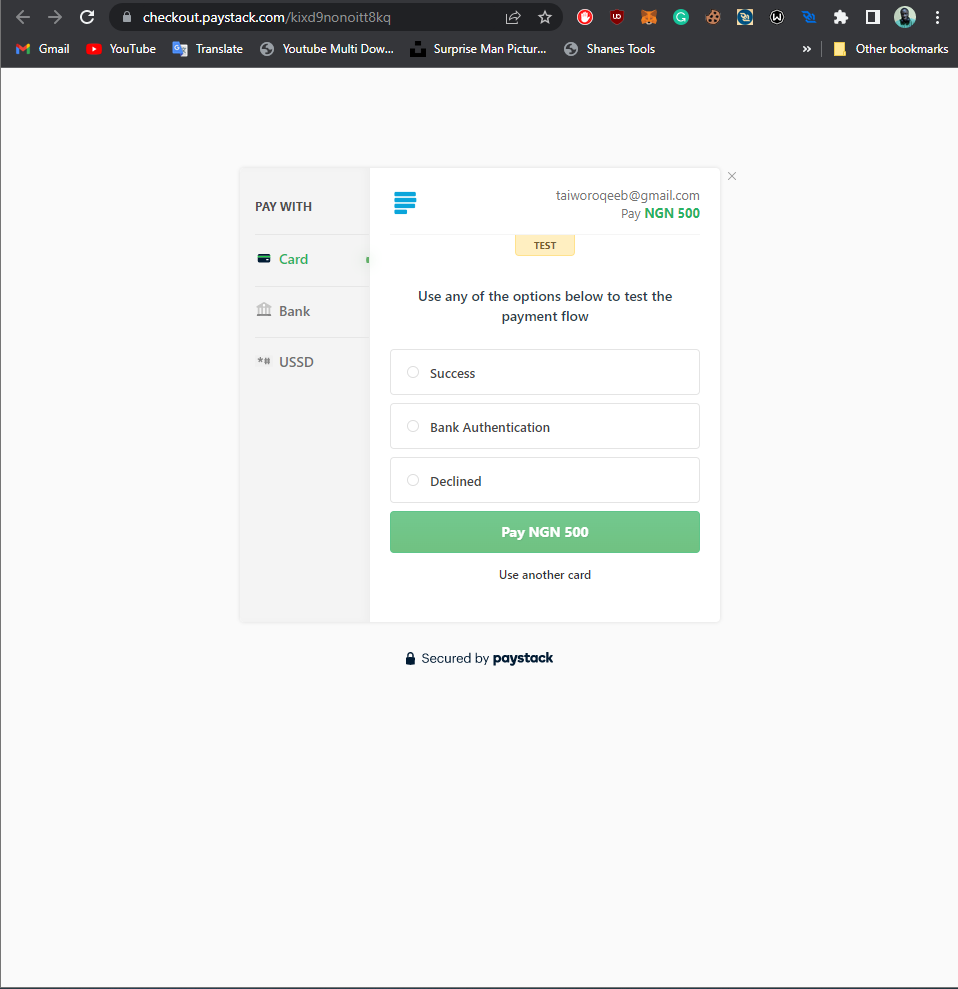
For other functions of the transaction, you can figure them out like above and use the parameters as seen here.
Verifying Transaction
To verify transactions through the API, you have to make sure to add the callback_url, this URL will be redirected after the transaction is successful and the reference number will be added in form of a query to the redirected URL like this
www.example.com?trxref=" Reference number"&reference=" Reference number"
paystack.transaction.verify(req.query.trxref)
.then(transaction =>{
   console.log(transaction
})
Output from Verified Transaction
{
    "status": true,
    "message": "Verification successful",
    "data": {
        "id": 2002145115,
        "domain": "test",
        "status": "success",
        "reference": "ou8lydbxhx",
        "amount": 50000,
        "message": null,
        "gateway_response": "Successful",
        "paid_at": "2022-08-06T10:05:43.000Z",
        "created_at": "2022-08-06T10:05:34.000Z",
        "channel": "card",
        "currency": "NGN",
        "ip_address": "102.89.38.113",
        "metadata": {
            "userId": "1"
        },
        "log": {
            "start_time": 1659780339,
            "time_spent": 4,
            "attempts": 1,
            "errors": 0,
            "success": true,
            "mobile": false,
            "input": [],
            "history": [
                {
                    "type": "action",
                    "message": "Attempted to pay with card",
                    "time": 4
                },
                {
                    "type": "success",
                    "message": "Successfully paid with card",
                    "time": 4
                }
            ]
        },
        "fees": 750,
        "fees_split": null,
        "authorization": {
            "authorization_code": "AUTH_94nofujms7",
            "bin": "408408",
            "last4": "4081",
            "exp_month": "12",
            "exp_year": "2030",
            "channel": "card",
            "card_type": "visa ",
            "bank": "TEST BANK",
            "country_code": "NG",
            "brand": "visa",
            "reusable": true,
            "signature": "SIG_X3HQR6lCmgpa7SHUhKxH",
            "account_name": null,
            "receiver_bank_account_number": null,
            "receiver_bank": null
        },
        "customer": {
            "id": 78903216,
            "first_name": "raqeeb",
            "last_name": "taiwo",
            "email": "taiworoqeeb@gmail.com",
            "customer_code": "CUS_a11iakhvmp9ja2g",
            "phone": "",
            "metadata": null,
            "risk_action": "default",
            "international_format_phone": null
        },
        "plan": null,
        "split": {},
        "order_id": null,
        "paidAt": "2022-08-06T10:05:43.000Z",
        "createdAt": "2022-08-06T10:05:34.000Z",
        "requested_amount": 50000,
        "pos_transaction_data": null,
        "source": null,
        "fees_breakdown": null,
        "transaction_date": "2022-08-06T10:05:34.000Z",
        "plan_object": {},
        "subaccount": {}
    }
}
Here you can choose to store any of the above information in your database.
Plan
This function is used to create a plan to subscribe to has the name described, for example, you might have up to 3 different plans that you want your customers to subscribe to per day or month, you can use this function to create the plans and also edit the plan's price/amount if you want.
This is the way to create a plan
    paystack.plan.create({
        name: "Plan name e.g basic",
        amount: 500 * 100,
        interval: "monthly", //e.g daily, yearly, weekly, biweekly, etc
        description: "description",
        invoice_limit: 0, //Rate at which customer gets billed
    }).then(plan => {
        console.log(plan)
    })
Output from plan
{
 "status": true,
 "message": "Plan created",
 "data": {
  "name": "Plan name e.g basic",
  "amount": 50000,
  "interval": "monthly",
  "description": "description",
  "invoice_limit": 0,
  "integration": 767539,
  "domain": "test",
  "currency": "NGN",
  "plan_code": "PLN_vq6tj7tetv6dbvt",
  "send_invoices": true,
  "send_sms": true,
  "hosted_page": false,
  "migrate": false,
  "is_archived": false,
  "id": 359274,
  "createdAt": "2022-08-07T09:57:36.907Z",
  "updatedAt": "2022-08-07T09:57:36.907Z"
 }
}
Here you have created a plan that your customers can subscribe to, for your customers to be able to subscribe to the plan you can use the subscription function or just create a page using the page function for the plan that you will redirect your customers too. I will only show you how to use the page function.
Page
This is a function used to create a subscription page for a plan, instead of using the subscription function all the time when a customer wants to subscribe, this page will be created for the plan permanently, i.e the customers can always go there to subscribe for the plan anytime.
How to create the page
    paystack.page.create({
        name: `plan's name`,
        description: "description",
        plan: 359274, //the plan's id
        amount: 500 * 100, //the plan's price
        channels: ['card', 'bank', 'ussd', 'bank_transfer'],
        redirect_url: `REDIRECT_SITE URL`
    }).then((pagebody) => {
        console.log(pagebody)
    })
Output from the page function
{
 "status": true,
 "message": "Page created",
 "data": {
  "name": "plan's name",
  "description": "description",
  "amount": 50000,
  "plan": 359274,
  "redirect_url": "http://localhost:3000/pay",
  "integration": 767539,
  "domain": "test",
  "slug": "2axeyi5d0u",
  "type": "subscription",
  "currency": "NGN",
  "collect_phone": false,
  "active": true,
  "published": true,
  "migrate": false,
  "id": 1197532,
  "createdAt": "2022-08-07T10:14:06.009Z",
  "updatedAt": "2022-08-07T10:14:06.009Z"
 }
}
Then go to the URL for the subscription. Goto: https://paystack.com/pay/${pagebody.data.slug} i.e https://paystack.com/pay/2axeyi5d0u. It will bring you to this page below.

To verify the payment, you can use the same verification as used in the transaction.
Well, so far I think I have done justice to the important part of Paysatck API if you have any questions, suggestions, contributions or observations feel free to reach out to me, Thank you!
Comments
Post a Comment